 Disjoncto


Draw
Building plan
The plan is to scale, in metres. It is the basis for the layout plan, cable routing and the bathroom zone calculation.
Walls#
Wall tool (W). Tap to place the first corner, then each following corner: a wall is created between two corners. The dimension of the current segment is shown live.
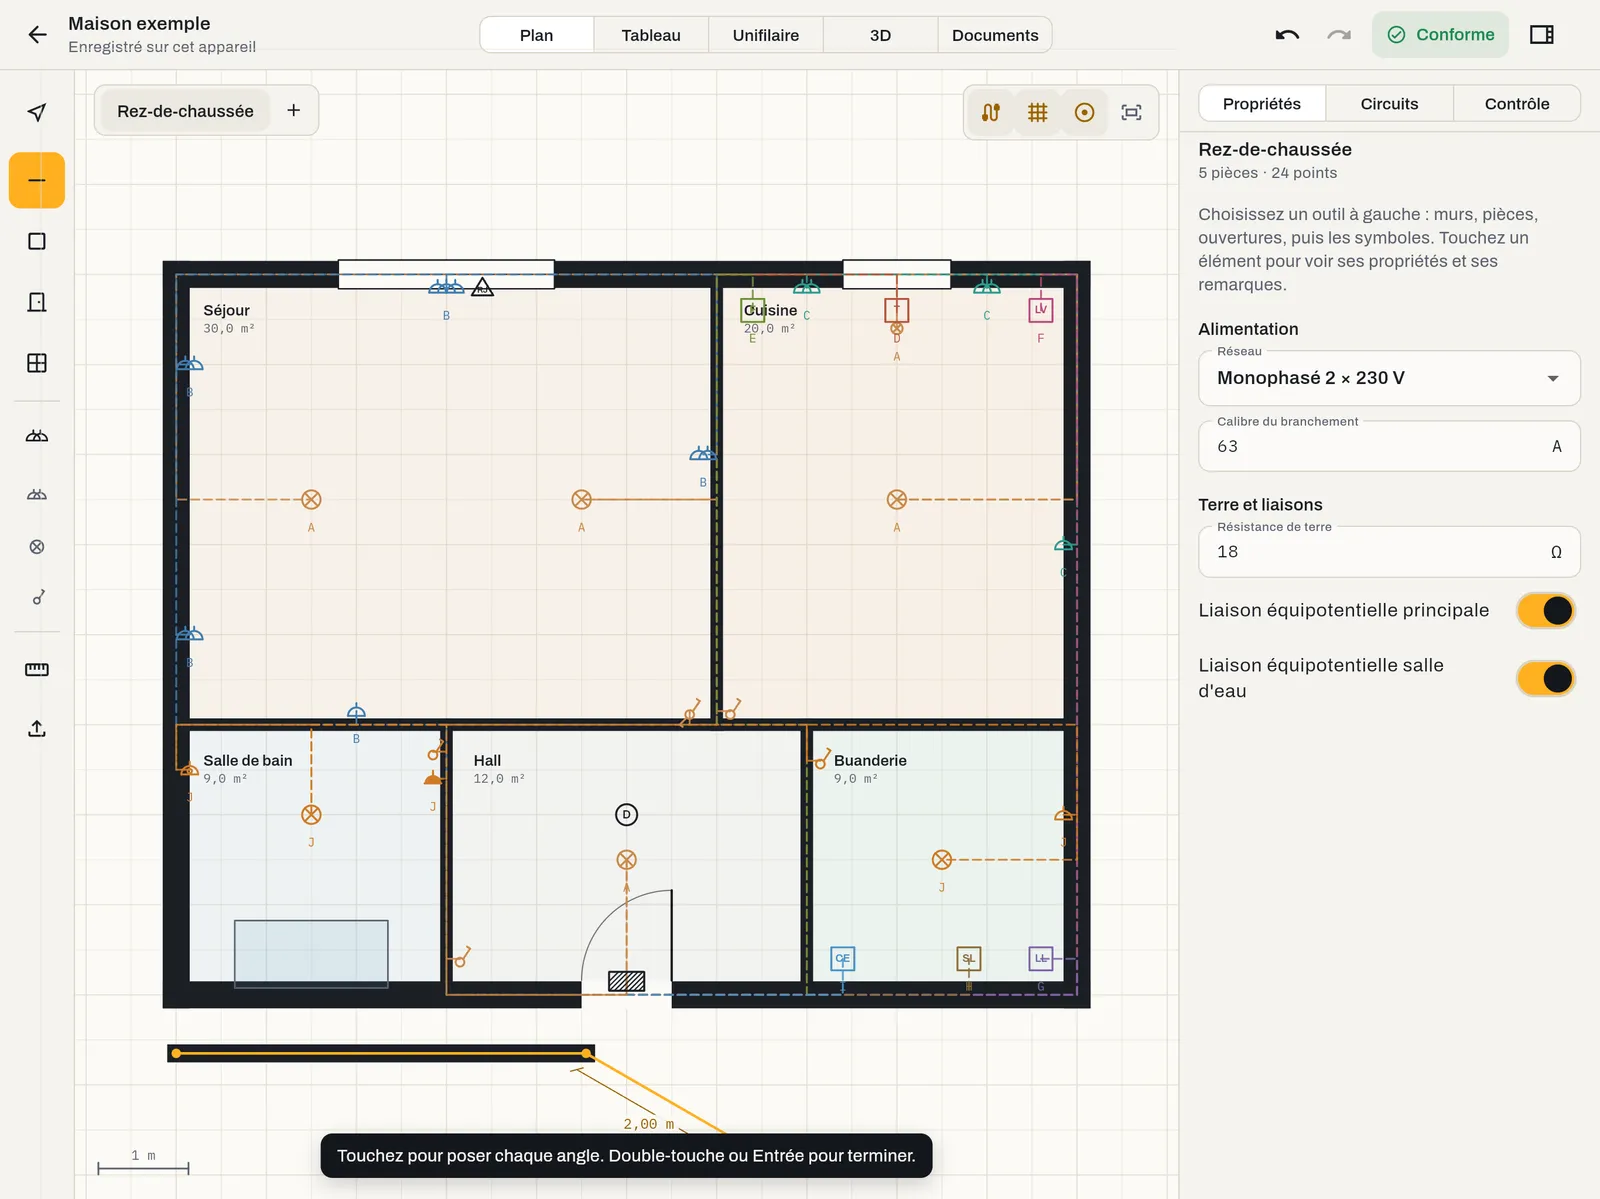
To finish: double-tap, Enter, or tap the first corner again to close the outline. Esc abandons the current segment.
Select a wall to see its dimension and properties: Length (changing the value moves the end), Thickness (20 cm by default), Height (2.60 m by default) and Exterior wall. The two handles at the ends of a selected wall can be moved; the walls joined at that corner follow.
Snapping#
The Snap button (top right of the plan) is on by default. While drawing, the point is attracted, in this order:
- to an existing wall corner (shown by an amber square);
- to an angle that is a multiple of 15° from the previous corner, with the length rounded to 5 cm;
- to an existing wall;
- to the 5 cm grid.
Hold ⌥ (Alt) to place a point freely. The Grid button (G) shows or hides the millimetre grid; it has no effect on snapping.
Rooms#
Room tool (R). Two ways:
- Tap inside a space enclosed by walls: Disjoncto detects the rectangle bounded by the nearest walls.
- Draw the outline point by point; close it by tapping the first point or by double-tapping.
A window asks for the room's name and type: Living room, Kitchen, Bedroom, Bathroom, Shower room, WC, Laundry room, Hall, Office, Garage, Cellar, Attic, Utility room, Outdoor or Other. The type matters: the kitchen groups its sockets on circuits of their own, and the bathroom and shower room trigger the zone calculation and the 30 mA requirement.
A selected room shows its area and number of points; its name and type can be changed in the panel.
Doors and windows#
Door (D) and Window (F) tools: tap a wall, within 40 cm. The door is created at 0.90 × 2.10 m, the window at 1.20 × 1.20 m with a sill height of 0.90 m. In the panel: type (Door, Window, Sliding door, Garage door), width, height, sill height, and Flip direction for doors.
Levels#
The level bar is at the top left of the plan. Tap a level to display it; + adds one from Cellar, Ground floor, 1st floor, 2nd floor and Attic (elevations −2.60 m, 0, 2.90 m, 5.80 m and 8.70 m). The new level takes the exterior walls of the current level as a starting point. A long press on a level lets you rename or delete it.
With nothing selected, the Properties tab shows the level summary (rooms, points) and the project data: network, supply rating, earth resistance and equipotential bonding. They feed the check.
Import a plan#
Import a plan button at the bottom of the toolbar. Accepted formats:
- PDF: the first page is converted to an image (150 dpi) and placed under the plan at 45% opacity;
- Image PNG or JPEG: placed the same way;
- DXF: LINE, LWPOLYLINE and POLYLINE entities become walls. The unit is read from the header ($INSUNITS: mm, cm or m), millimetres by default.
Automatic wall recognition on a PDF or a photo is coming soon.
Set the scale#
After importing a PDF or an image, the scale tool activates: tap two points whose distance you know (a dimension on the plan, a façade), then enter the real distance in metres. The imported plan is scaled around the first point. Start again if needed by importing once more. Then redraw the walls over it with the Wall tool.
Dimensions and measuring#
Dimensions appear while drawing a wall and on any selected wall, in metres with two decimals. The Measure tool (M) measures between two tapped points; a third tap starts again. Measuring snaps like walls do.
Navigating the plan#
- Fingers: one finger on empty space pans the plan, two fingers pan, zoom and rotate (rotation snaps to 0° and 90°).
- Mouse: wheel to zoom, ⇧ + wheel or middle button to pan; dragging on empty space draws a selection rectangle.
- Trackpad: two fingers to pan, pinch to zoom, twist to rotate.
- Fit all (⌘ 0) reframes on the level.
Details per device: Devices. List of keys: Keyboard shortcuts.